
Model : ST1000LX015-1U7172-SSHD
Serial : WDEPE2Q8
Firmware : SHM3
Capacity : 1 000 GB (1 953 525 168)
Hello guys!
The issue with a damaged NAND chip is very popular for the ST1000LX015 and ST2000LX001 models. At the ACE Lab Online Technical Conference 2021 we showed a case on this topic. Following up, this blog article with step-by-step instructions explains the provided solution.
The difference between Classic HDD and Hybrid SSHD is a NAND memory chip located on the PCB. This chip was added to improve the HDD initialization speed, and it stores a part of HDD FW. Also, it’s used as a cache for the user data.
At the same time, the NAND chip becomes a weak point of the drive due to the Flash memory specifics. It means if this chip is damaged, the drive won’t be able to initialize itself even if the SA part on the platters is OK.
How to recognize the problem?
The behaviour is similar: the drive isn’t spinning after power on but it comes to the DRD + DSC state and shows the correct passport information. Usually, after power on, you can see such an error message in the Terminal tab:
LED:0x000000BD FAddr:0x000059D8
So what to do?
First of all, it’s necessary to understand that in this case the patient’s PCB is damaged. We can’t unlock the drive using the native board!
Which parameters should I follow to choose a suitable donor?
- Same HDD model
- Same FW version
- Same PCB number
All three parameters should be followed.
What is the solution?
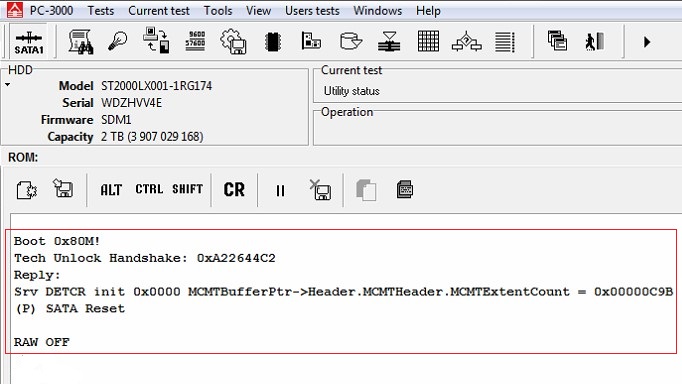
1. Read the patient ROM via Terminal
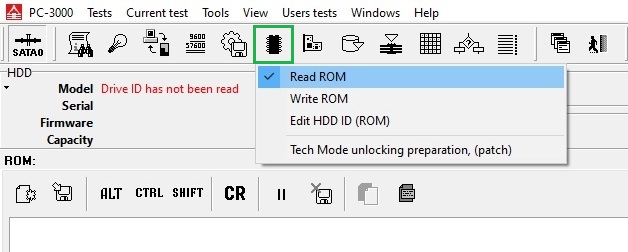
2. Let’s unlock the Donor at first:
1) Work with the Flash ROM image file (Baud rate = 460800 always works)

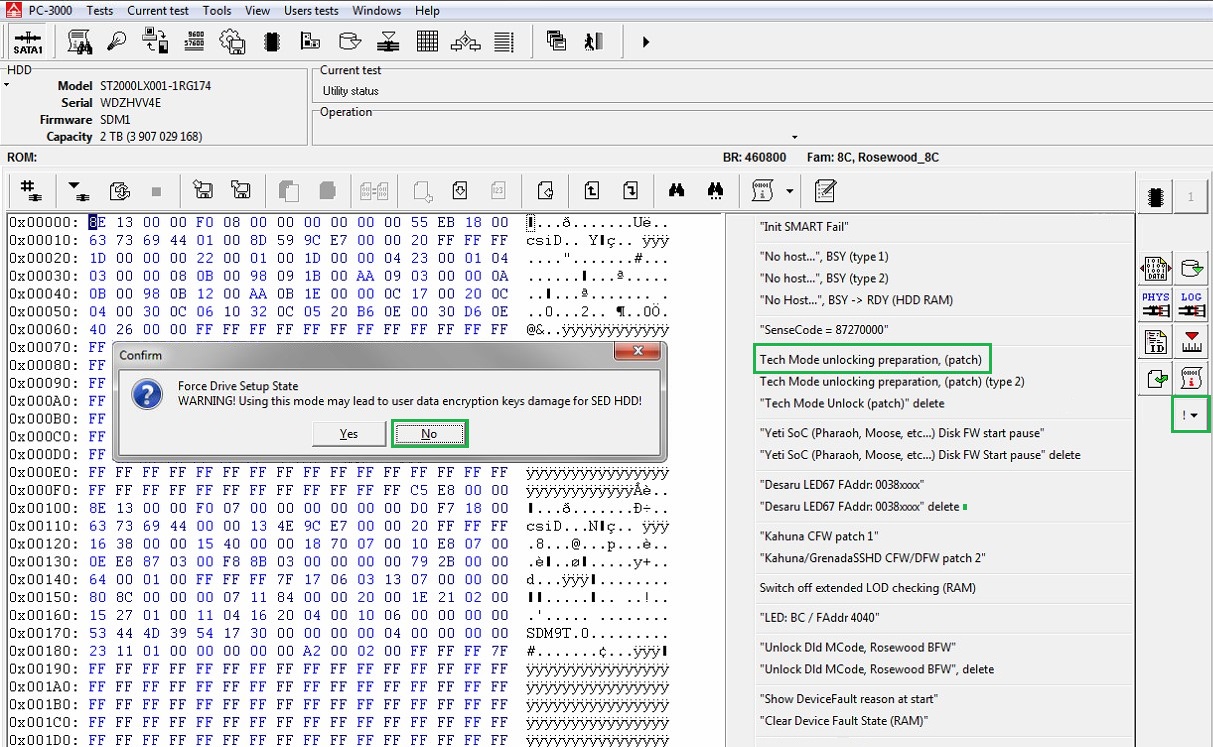
2) Perform the unlocking patch
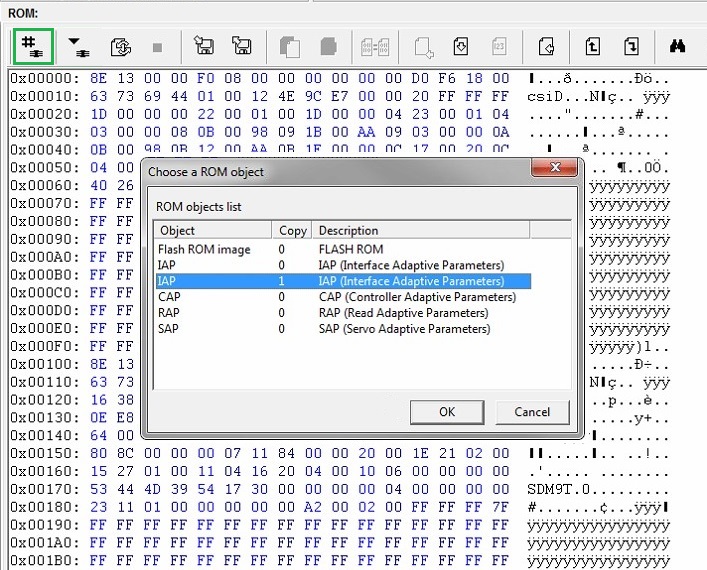
3) Open IAP (copy 1)
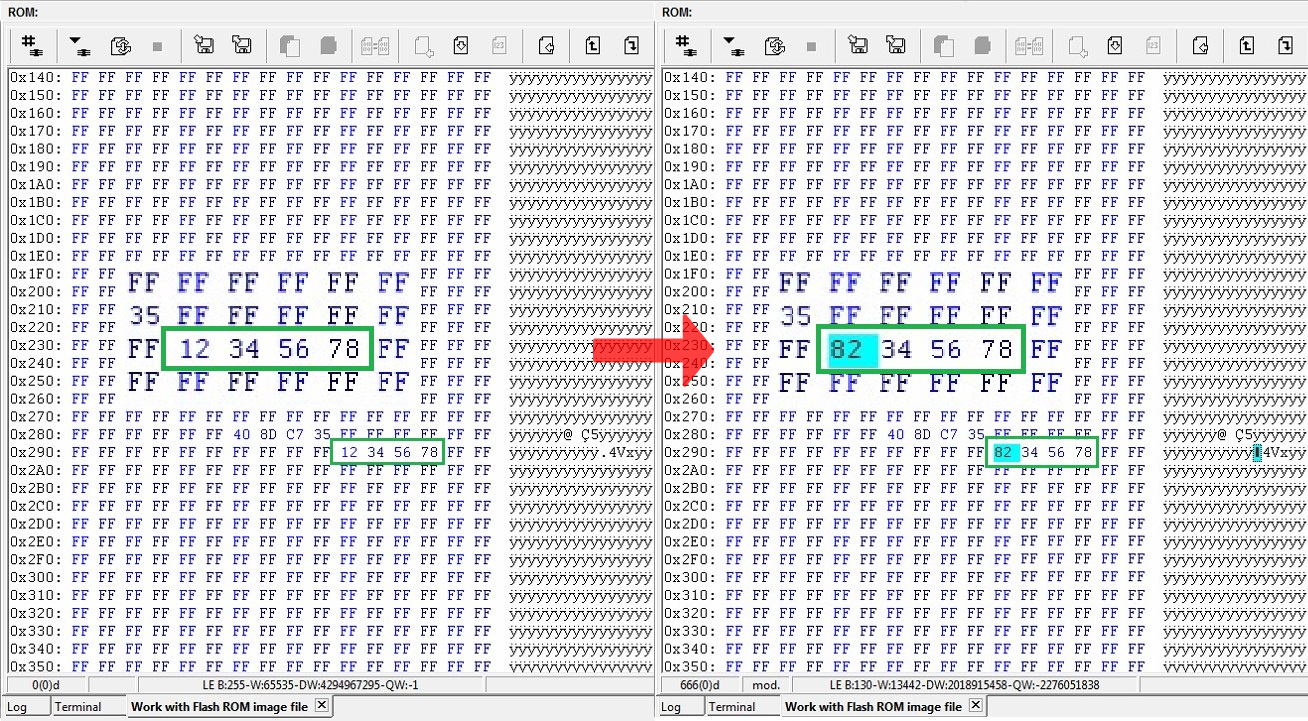
4) Find the sequence of bytes 12 34 56 78 and change the first byte to get 82 34 56 78
5) Apply the changes by writing ROM via Terminal ![]()
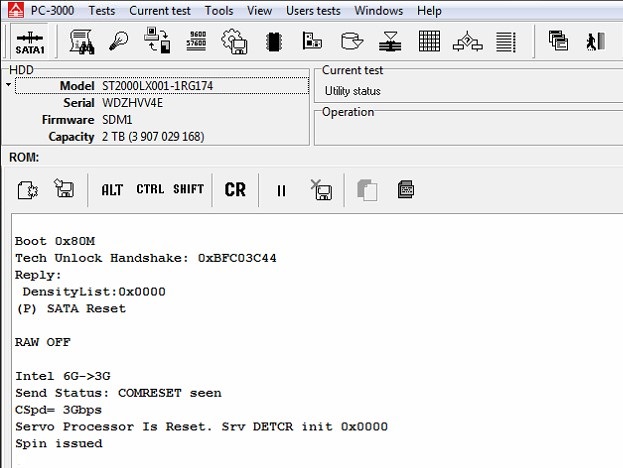
6) Repower and unlock ![]()
At this stage, the drive won’t come to the Ready state. The terminal log will show:
7) Open the Work with Flash ROM image tab, change the sequence of bytes to 12 34 56 78 back and write it.

8) Again repower the drive and unlock it. Now your donor drive is unlocked and can work via ATA!
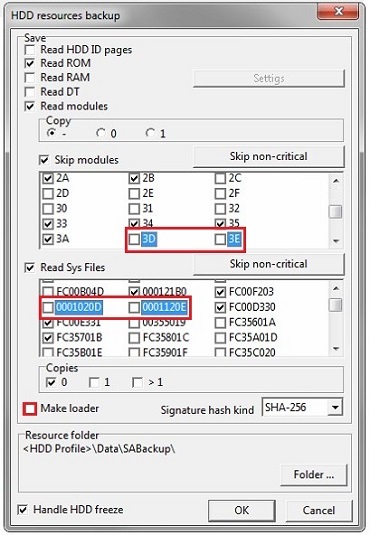
9) It’s time to do a Backup ![]()
NOTE: It’s important to exclude 3D, 3E modules and 20D,20E sys files from saving. Also please disable the Make loader option.
10) NAND reinitializing via the Terminal command /OI1
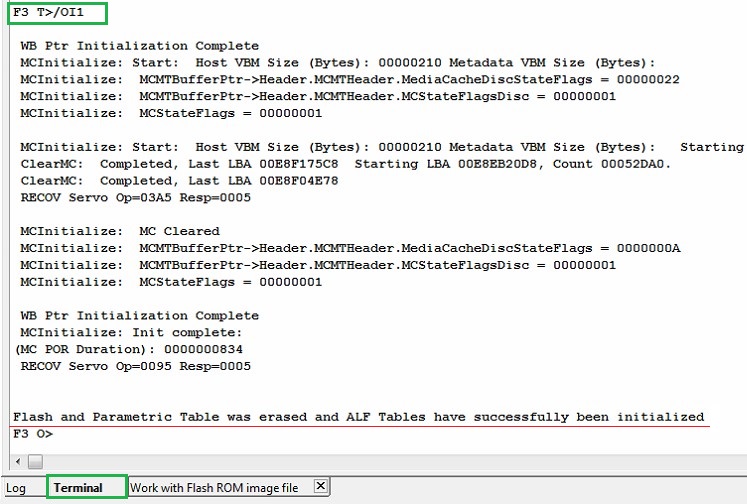
We have successfully unlocked the donor and prepared its PCB to work with the patient drive.
Show add. diag. msg in Terminal [NO] :
T>F"SerialDebugLevel",0
Offline defect sparing [NO] :
T>F"OFFLINE_SPARING_ENABLED",0
Deferred defect hiding [NO] :
T>F"DAR_ENABLED",0
Auto Reallocation (writing) [NO] :
T>F"WRITE_SPARING_ENABLED",0
Auto Reallocation (reading) [NO] :
T>F"READ_SPARING_ENABLED",0
Disable IDLE activities [YES] :
T>F"DISABLE_IDLE_ACTIVITY",1


0 comments: